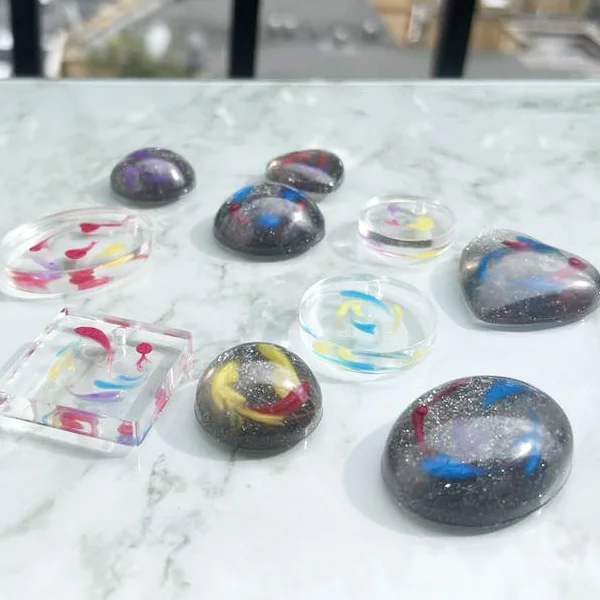
Swirl Charms
The brilliant resin artist Daniel Cooper can be credited for this awesome swirling pattern technique. It’s a really fun way to work with resin, and he has plenty of other techniques to play with.
What you’ll need
About £9 for a good pack of mica powders if you already have some 2-part resin and hardener.
- 2-part epoxy resin (resin and hardener)
- Assorted mica powder colourants (mine are from RolioPigmentsUK on Etsy)
- Mixing cups and stirring sticks
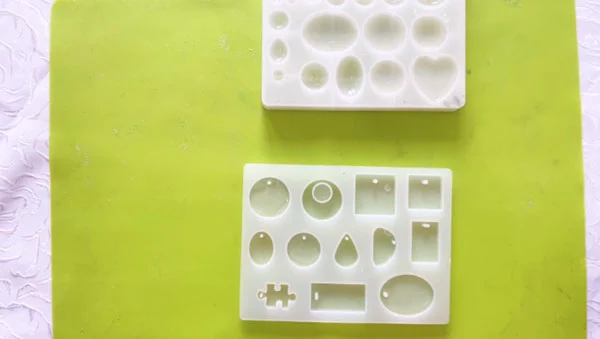
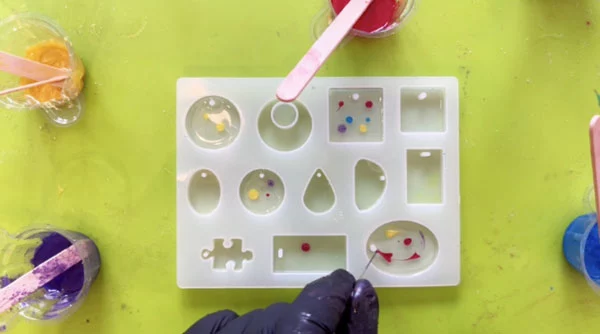
- Small charm moulds (mine came with an Amazon starter pack)
- A sewing needle and a toothpick
- Safety gear
Steps
Step 1
Mix some clear 2-part resin and fill your moulds just over halfway
We’ll be adding drops of coloured resin and a backing layer later, so we need a bit of space left over. Leave this for around 2 hours to get a little bit more solid and ‘tacky’.
Step 2
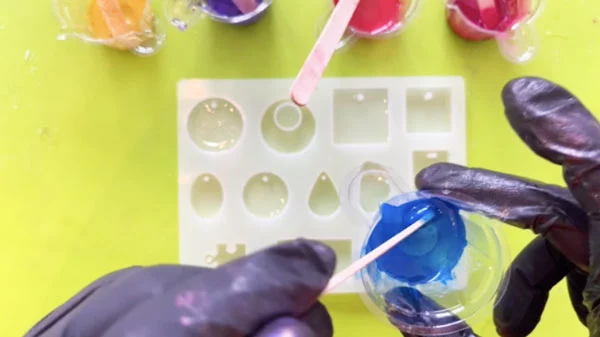
Mix your colour powders with some fresh 2-part resin into some small mixing cups
We don’t need a lot of resin for this. Make sure the colours are quite solid.
Step 3
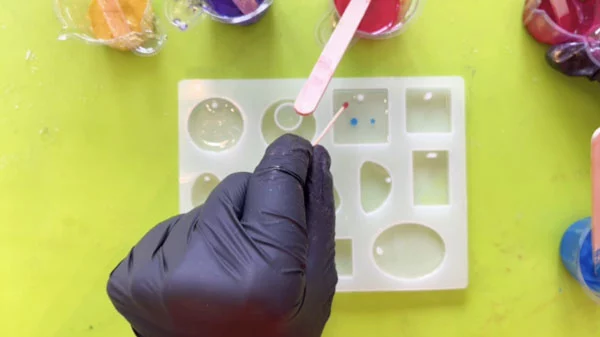
Using a toothpick, drop dots of resin into your moulds
Do this quite slowly and carefully to prevent the drops from becoming blobs. They shouldn’t sink much as the resin in the moulds has had time to solidify.
Step 4
Drag a sewing needle through the dots to create swirling patterns
Be careful not to scratch the bottom of your mould. Experiment with your swirling; even dragging the needle next to the dots instead of through them can create interesting patterns. Leave to cure for around 3-5 hours, or even longer if you prefer.
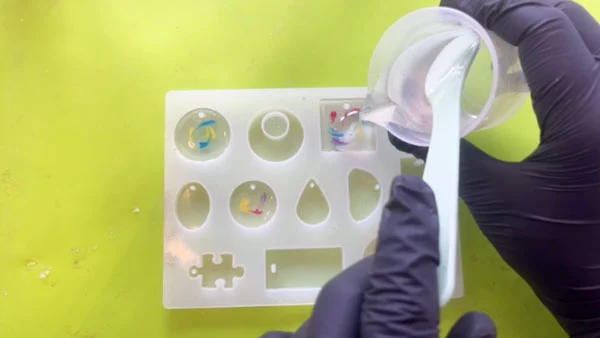
Step 5
Add 2-part resin to the moulds to finish them off
You can use clear resin, or even a dark colour so that the bright colours show up on a dark background. Fill to the top of the mould and leave to cure for 24 hours.
All done! Enjoy your swirls.
Leave a Reply