LED Nightlight
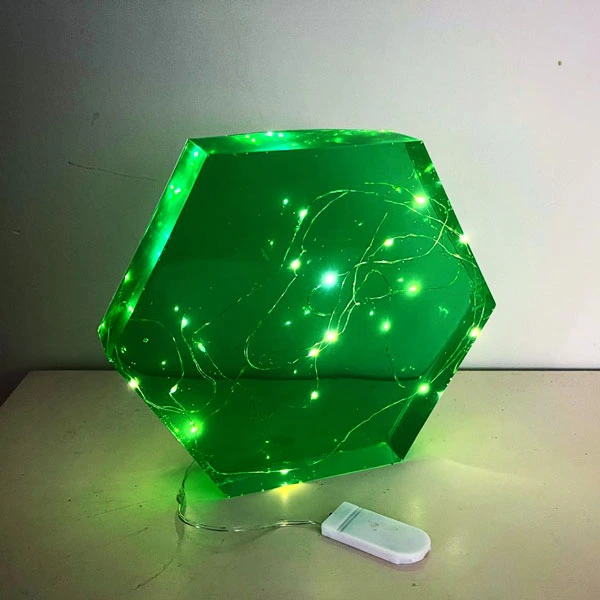
This might be my favourite thing to make. This effect of lights in coloured resin is extraordinary, and this can make a magnificent gift. As the very lovely Steve McDonald points out, the beauty of this project is that bubbles don’t matter, and even add to the beauty of your nightlight. You can make small or large nightlights. In this tutorial, I’ve gone for a pretty big one.
What You’ll Need
The cost of this depends on the size of your project. You’ll need quite a lot of resin for a big mould, and the costs can mount up quickly. If you’re on a budget, do use a smaller mould, such as a palm-sized cube. You can pick up the LED lights quite cheaply from Amazon.
- 2-part epoxy resin (resin and hardener)
- Silicone mould of your choice
- LED lights (I got a pack of 12 for £7.99 from Amazon)
- Liquid resin dye. You can also use a little mica powder, but too much will make the nightlight more opaque.
- Mixing cups and stirring sticks
- Safety gear
Steps
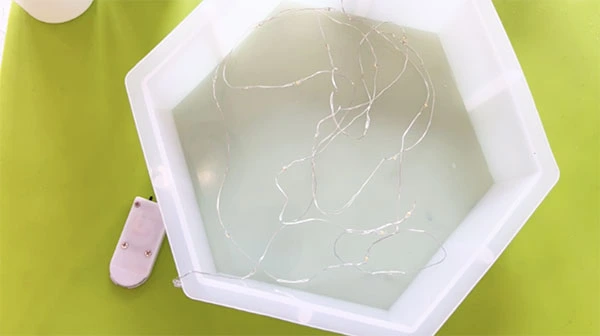
Step 1
Bunch up your lights and place them in the mould
Now would also be the best time to test that they work. Place them in your mould, and arrange them as evenly as you can. Make sure they don’t stick out of the top. Bend the end of the lights with the power switch safely out of the way.
Step 2
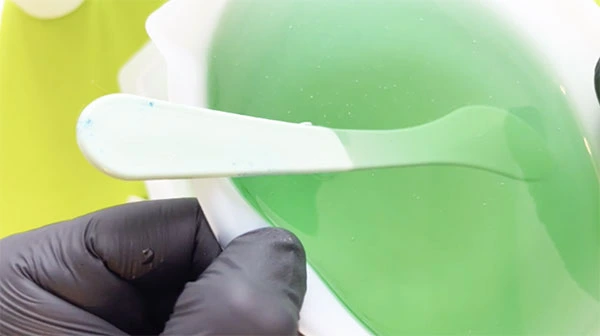
Mix your 2-part resin and hardener and add any colourants
Judge how much resin you’ll need by looking at the mould. As my mould is fairly gigantic, I had to mix up more than one batch, as my largest pouring cup only holds 600ml. You can then add a few drops/sprinkles of your chosen colour, along with any extras like glitter if you like.
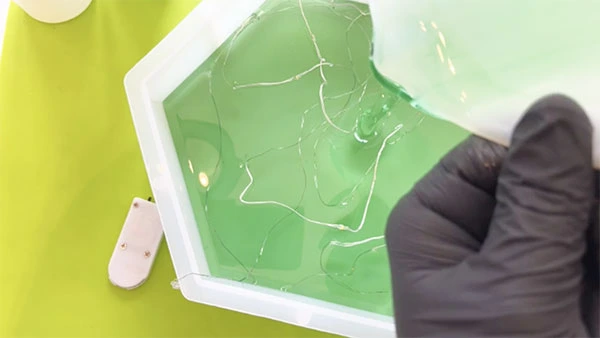
Step 3
Pour your resin into the mould
As you pour, your lights might start to float to the top a little. If you can’t push them back down completely, you can do what I’ve done here and leave a bit of space. You can leave what you’ve poured so far to cure for anywhere between 5-24 hours and then add a separate layer to keep them trapped once and for all. Once you’ve filled your mould to the top, leave to cure for at least 24 hours.
Light up and relax!
Leave a Reply